BatteryBug
Battery Failure Warning System
Product review by:
Bruce Bonebrake
Argus Analyzers
PO Box 203
Jamestown, RI
02835
When it comes to caring for our vehicles, there is one area which we have little control of as far as preventing becoming stranded. Maybe this has happened to you before... your ready for work, maybe running close on time, and then it happens..you turn the key in the ignition, and nothing, or hear the starter solenoid make a click-click-click sound....no start. Or maybe after shopping or going out to eat, same thing, no start. What seems odd to you is there was no warning of anything wrong with the vehicle. The last start, the engine started right up like it always does. What happened? Well if you have been in this situation, you already know..the battery failed. The thing is the battery can fail any time.
The normal lifespan of a battery is three years. After that, you are on "borrowed time." Ambient temperature is a determining factor of when the battery may fail, as extreme heat conditions is when the majority of battery failures occur. Still, there is a chance that the extreme temperatures were a factor in a battery failure, but the battery can fail at any time, and at any temperature. So here we are back to having no control over when the battery needs to be replaced..BEFORE it leaves us stranded. Now I have some good news.. I had the pleasure of talking to Jim Hamann at ARGUS Analyzers about some of their products, and he mentioned the BatteryBug, and what it does, and I have to tell you folks, this is the answer!! I have been reviewing this product for a couple of weeks now and I am EXTREMELY impressed with it. I have written this review going into detail what the BatteryBug is and I think after you read this, you will realize that this is a MUST HAVE tool.




c2007-2008
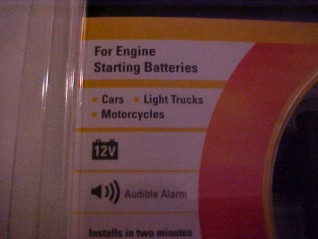
Both images above show the front and back of the package. There are three items on the front of the package that I wanted to mention..


As seen on the package, the BatteryBug can be used on cars, trucks and even motorcycles. It is designed for use on engine starting batteries and not on a battery used for deep cycle service such as a marine trolling battery or an RV accessory battery
This states what the designed use of this tool is. It is designed to eliminate the risk of ever being stranded by a battery failure again.
The tool uses advanced and patented CrankCheck Technology and you can also see where the tool recieved the AAPEX "Best Product" award.

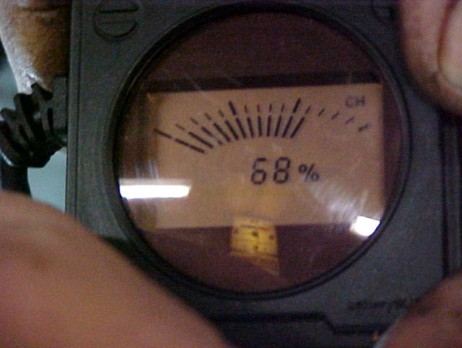
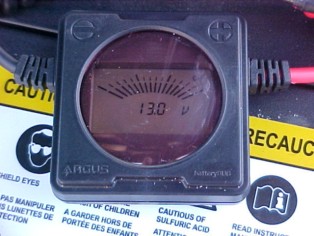
When you open the package, the contents of the BatteryBug is the unit itself, and the user's manual. The user's manual is easy to understand and explains in detail how to connect the unit and how to use it, along with conditions that may appear on the testers LCD display. To give you an idea as to the size of the tester, I have taken a picture of the unit in the palm of my hand.
Battery Failure Warning System
Product review by:
Bruce Bonebrake
Argus Analyzers
PO Box 203
Jamestown, RI
02835
When it comes to caring for our vehicles, there is one area which we have little control of as far as preventing becoming stranded. Maybe this has happened to you before... your ready for work, maybe running close on time, and then it happens..you turn the key in the ignition, and nothing, or hear the starter solenoid make a click-click-click sound....no start. Or maybe after shopping or going out to eat, same thing, no start. What seems odd to you is there was no warning of anything wrong with the vehicle. The last start, the engine started right up like it always does. What happened? Well if you have been in this situation, you already know..the battery failed. The thing is the battery can fail any time.
The normal lifespan of a battery is three years. After that, you are on "borrowed time." Ambient temperature is a determining factor of when the battery may fail, as extreme heat conditions is when the majority of battery failures occur. Still, there is a chance that the extreme temperatures were a factor in a battery failure, but the battery can fail at any time, and at any temperature. So here we are back to having no control over when the battery needs to be replaced..BEFORE it leaves us stranded. Now I have some good news.. I had the pleasure of talking to Jim Hamann at ARGUS Analyzers about some of their products, and he mentioned the BatteryBug, and what it does, and I have to tell you folks, this is the answer!! I have been reviewing this product for a couple of weeks now and I am EXTREMELY impressed with it. I have written this review going into detail what the BatteryBug is and I think after you read this, you will realize that this is a MUST HAVE tool.
c2007-2008
Both images above show the front and back of the package. There are three items on the front of the package that I wanted to mention..
As seen on the package, the BatteryBug can be used on cars, trucks and even motorcycles. It is designed for use on engine starting batteries and not on a battery used for deep cycle service such as a marine trolling battery or an RV accessory battery
This states what the designed use of this tool is. It is designed to eliminate the risk of ever being stranded by a battery failure again.
The tool uses advanced and patented CrankCheck Technology and you can also see where the tool recieved the AAPEX "Best Product" award.
When you open the package, the contents of the BatteryBug is the unit itself, and the user's manual. The user's manual is easy to understand and explains in detail how to connect the unit and how to use it, along with conditions that may appear on the testers LCD display. To give you an idea as to the size of the tester, I have taken a picture of the unit in the palm of my hand.